Masks
Masks or shapes or drawing is simply a vector drawing that is used to cover some area with a solid color. The purpose is generally to cover the original text so that we can put our own text over it. Mask can be treated like a text for almost all intents and purposes. You can color it, blur it, apply opacity to it and so on.
We will almost always use an automation script to generate a mask. We have not even introduced what automation scripts are or how to use them. The purpose of discussing masks here is to learn what masks actually are. It is important to know what the automation scripts are doing, is it not?
So what you learn in this page is for reference to what masks are. We will not learn how we make masks.
How We Make Masks
I lied. Remember, we learned how to create clips in the page just before this.
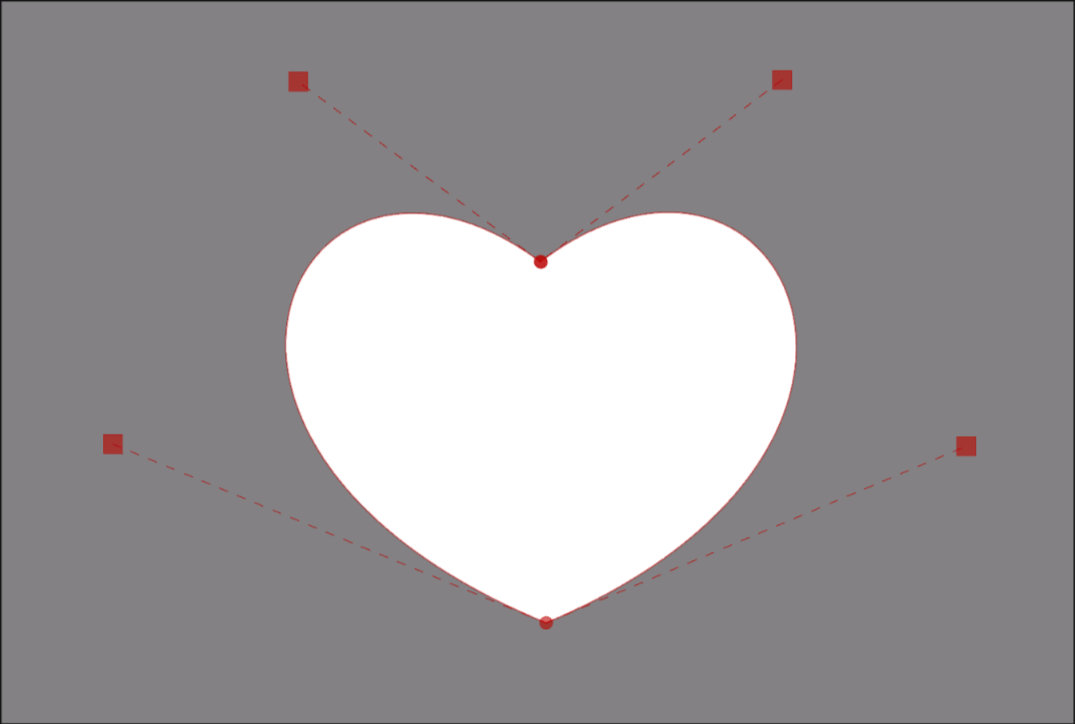
Let's take this vectorial clip (There's a reason why I took vectorial clip and
not rectangular clip but that is beyond today's lesson) and look at how it looks
in the Edit Box.
{\clip(m 1301.45 590.6 b 1601.09 339.9 1829.45 845.26 1308.45 1089 771.08 842.38 1001.15 342.59 1302.21 591.48)}
Notice that inside the parenthesis, you will find a bunch of numbers and letters. Let's do something together:
- Copy everything that is inside the parenthesis.
- In a completely new line, add a tag block
{\an7\pos(0,0)\p1}. - After the tag block, paste what you copied.
{\an7\pos(0,0)\p1}m 1301.5 570.625 b 1601.125 328.375 1829.5 816.75 1308.5 1052.25 771.125 814 1001.125 331 1302.25 571.5
Here, I have demonstrated a relationship between clip and shape i.e. the region that the clip covered can be converted into shape and vice versa. This is exactly what automation scripts do when they convert clips to mask. That is all you need to know for now.
Drawing Tag
Local / Untransformable Tag
A bit late since we already used \p tag above. This tag is what enables
drawing mode and the text after this tag block will then be interpreted as
drawing instructions and not as visible text.
| Format | Description |
|---|---|
| \p1 | Enable drawing mode |
| \p0 | Disable drawing mode Text after this will be treated as normal visible text |
Warning
Drawing tag does not only take 0 and 1. It can take any other positive integer but you will not be needing that so I'll not be explaining that.
Coordinate of the ASS
I've tried to avoid talking about this till now but there's no avoiding it since
the numbers you see in the drawings are coordinates. We've also used coordinates
in \pos tag and \org tag but we never had to truly understand it for them but
if you want to understand the drawing commands, you need to understand coordinate
system we are using.
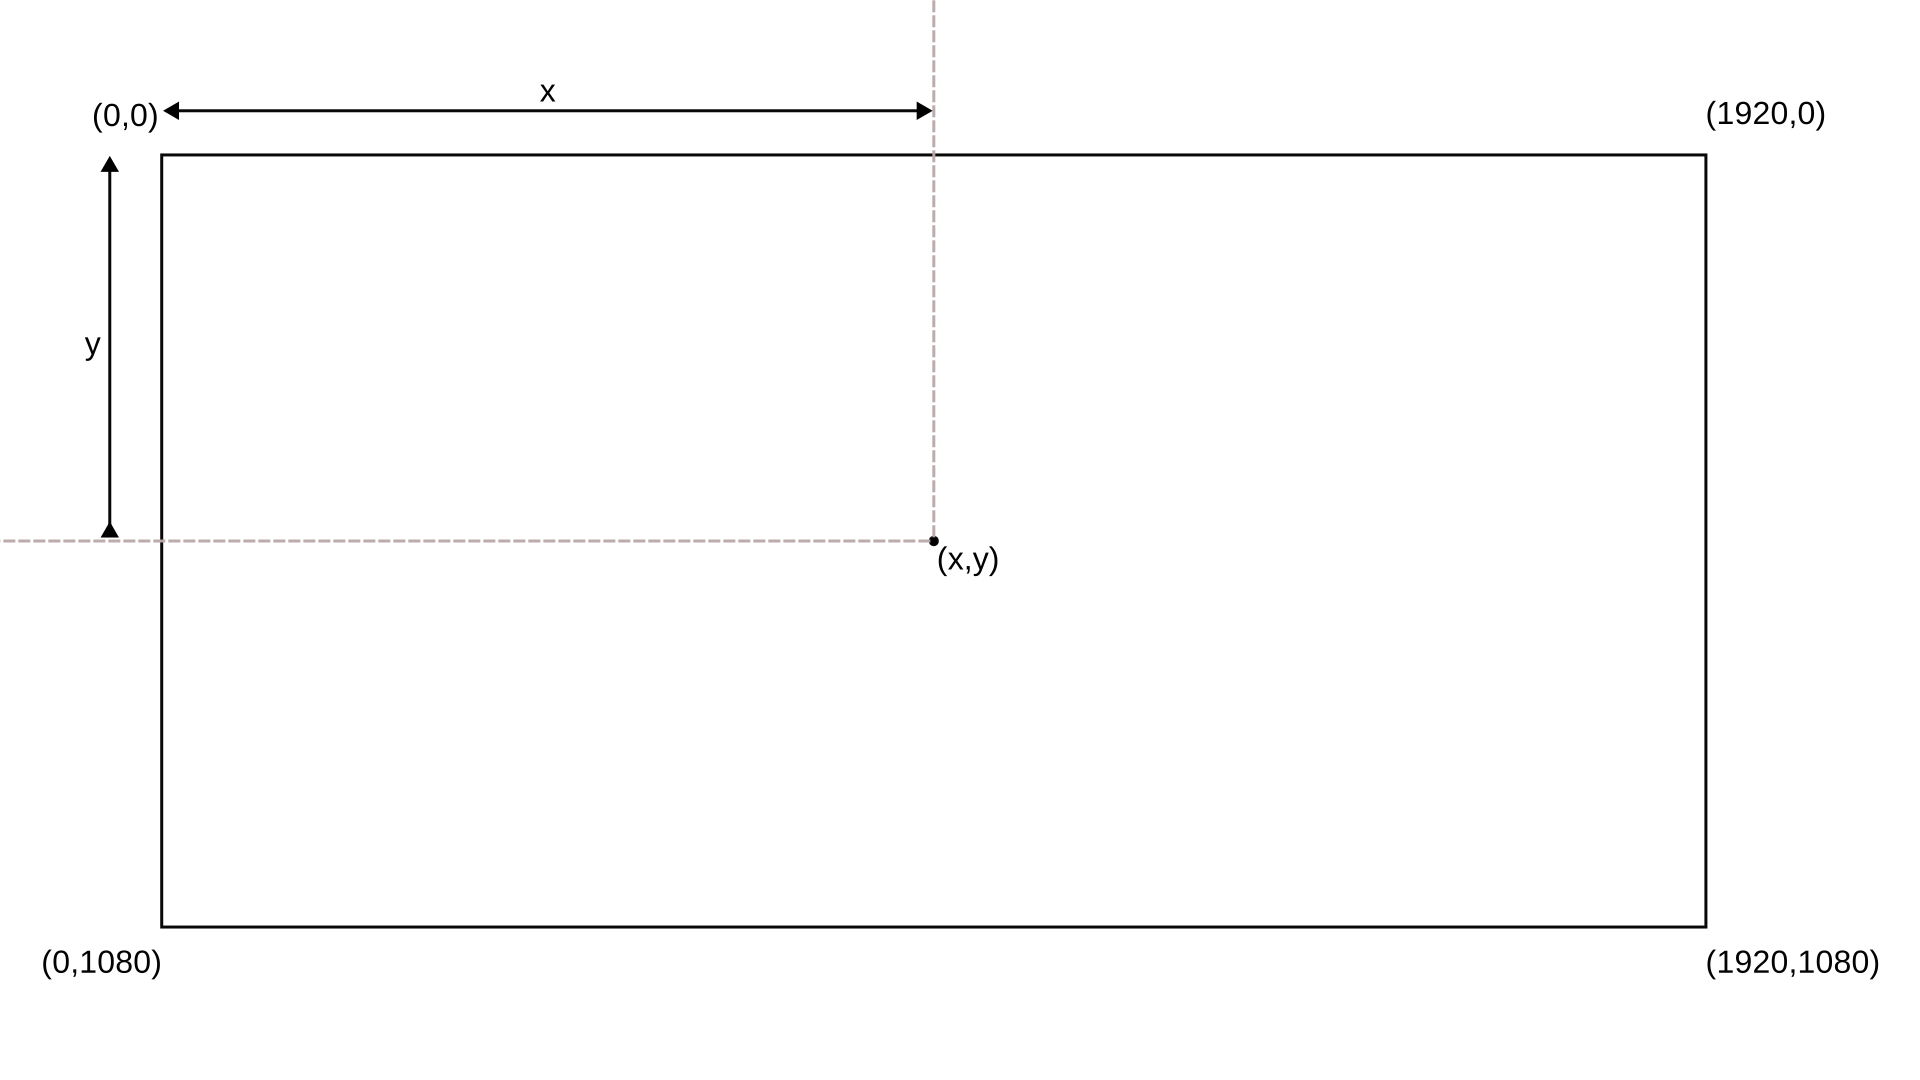
Let us take a video of resolution 1920x1080. The origin is always at top left
of the video. Both the right and down direction from the origin is positive. So
this is like fourth quadrant but y axis is positive.
So when you have a coordinate (x, y) anywhere in the video, it means it is x pixels right from the
origin and y pixels down from the origin.
Coordinates can be negative. x coordinate being negative means it is left of
the origin. Similarly, y coordinate being negative means it is above the origin.
Drawing Commands
These commands appear either inside vectorial clip or after \p1 tag. Each
drawing command is started using a letter followed by coordinate(s). We shall
think of this like you have a pen in your hand and are ready to draw.
| Command | Numer of coordinate | Description |
|---|---|---|
| m <x> <y> | 1 | Moves the pen to coordinate x, y touches the pen to paper. |
| l <x> <y> | 1 | Draw a line from where pen has touched the paper to coordinate x, y Keeps the pen touched to paper. You can repeat coordinates after this as many times as you want. If you have n number of coordinates after command l, it means you continuously drew n number of lines. |
| b <x1> <y1> <x2> <y2> <x3> <y3> | 3 | Draw a cubic bézier curve from where pen has touched the paper to coordinate x3, y3 . x1, y1 and x2, y2 are the control points of the curve.Keeps the pen touched to paper. You can repeat coordinates after this as many times as you want. Every 3 set of coordinates after command b forms one bézier curve. |
Can you now scroll up, look at the drawing commands above and then decipher what they did to form a heart shape?